Disclosure: Some of the links below are affiliate links, meaning, at no additional cost to you, I may earn a small commission if you click through and make a purchase.
Welcome to Day 5
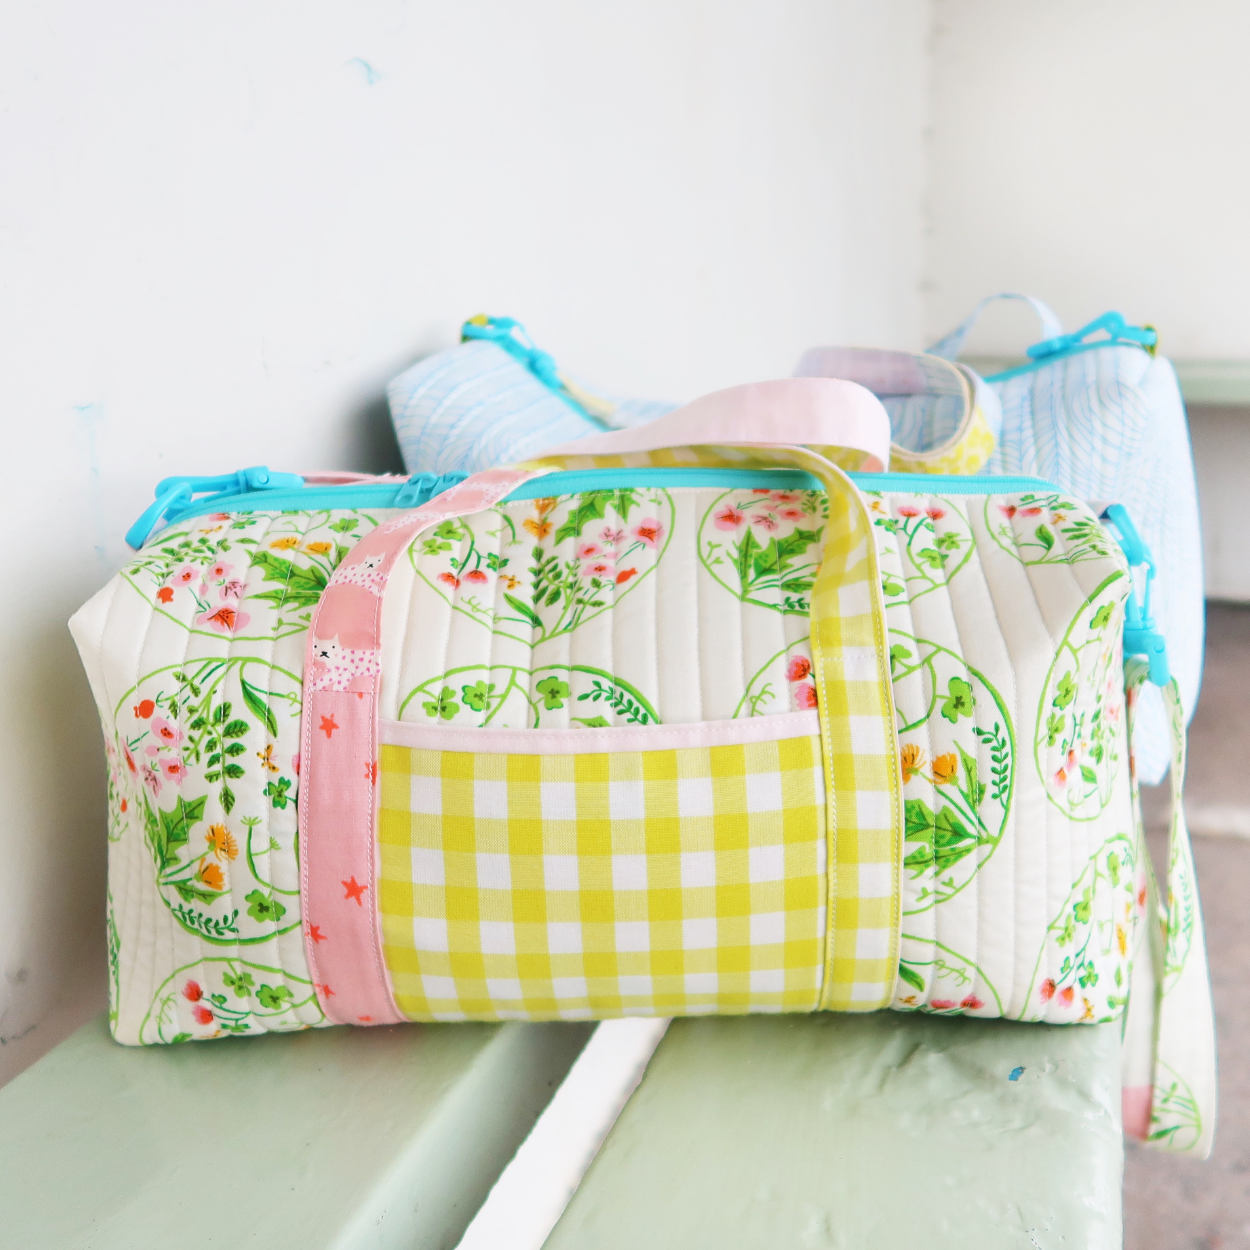
Welcome to day 5 of the Easy Duffle Sew Along! So close to the finishing line.
Today we are assembling your duffle. Inserting the zipper. Box out the corners and finish your bag. Probably the quickest day of the Sew Along.
And of course - welcome back if you skipped yesterday's task of adding pockets and handles.
Schedule
Now. Before we diving right in. Here's the schedule again.
- Day 1 - material pull
- Day 2 - piecing the outside
- Day 3 - quilting the duffle
- Day 4 - handles and pockets
- Day 5 - assembly (today)
- Day 6 - shoulder strap
Super quick turnaround. I today you probably won't even need a full hour. Your zipper will be in, we box out your corners and then we are pretty much done.
If you feel you're falling a little behind. No worries. Don't feel pressured along. Catch up whenever you're ready. You are the one in charge!
Day 5 - Video
And here's the video for Day 5 of the Easy Duffle Bag Sew Along. Tab on the image below to play it!

Today I am showing you how I insert the zipper (it's so much easier than you might think - trust me, it's definitely not rocket science). And then I share how I box out all six corners (yes... you heard this right). Before turning and finishing the bag.
Technique
A couple words on how to install a zipper (the easy way). Again. I promise to keep it short.
Make sure to sandwich your layers. First up is the lining (right side facing up). Then comes your zipper (zipper teeth facing up). And then your outside panel on top (right side facing down). Clip it all neatly in place using binding clips.
Now sew along the edge using a zipper foot (or a 1/4" seam allowance). Open it all up and repeat for the other side.
Lining in front of you (right side facing up). Zipper on top (zipper teeth facing up) and then your outside panel on top (right side facing down). Make sure all the layers are lining up and then clip it in place before sewing it together.
Open up your sandwich and and give it a good press. Now topstitch along the edges using a 1/8" seam allowance for a neat finish. Install your "loop'ed" up D-rings and that's the zipper bit done.
And after this. We assemble your bag by folding it like a sandwich. Sewing the (outer) edges together before boxing out all six corners. You can see all of this in the video above.


Materials
And here a list with all the materials you'll need today. Not too much, really.
Zipper. The length of your zipper depends on the size of your duffle. For the Mini you'll need a 15" zipper (or longer) and for the Large Duffle it's an 18" zipper (or longer).
I buy them in bulk! I order mine all the way from the US but they are here in absolute no time, super cheap if I buy a pack of a 50 or more and the colour choice is amazing (cotton candy pink, bubble gum pink and gray are my faves if you were wondering).
Hardware. Today you'll need your D-rings. Preparing your duffle bag so you can easily clip in your shoulder strap (that we are making tomorrow on day 6). I buy mine here together with my swivel hooks and sliders. Making sure they all match in size.
Basic quilty notions. And finally, some quilty notions will come in handy. Today I am using my wonder clips, cutting mat, rotary cutter and ruler. But again... you probably have all of those already.
Big picture
And if you like to sew the Easy Duffle in one go and need a little more visual help - watch the full video tutorial right here. Rather than me breaking it down into small quilty vlog chunks.
The video tutorial in combination with the pattern will walk you through every step of the process. Quick and efficient. If that's for you.
Be social!
And of course, please feel free to share your finished duffle over on Instagram (or Facebook) using the #easydufflebag. I can't wait to see it!!
And thats's a wrap for day 5. You done it! Zipper in. Bag done. Wahooo. Tomorrow we are making your shoulder strap and then we get to celebrate. I am so excited.
I hug your face,
Laura x


-----------------------------------------------------------
This blog post contains affiliate links, specifically I am a participant in the Amazon Services LLC Associates Program, an affiliate advertising program designed to provide a means for us to earn fees by linking to Amazon.com and affiliated sites. I will never post a link to a product I do not personally recommend. If you click on an affiliate link and then proceed to purchase something from that affiliated website, I receive a small commission. This helps me continue to provide high quality, free content. Please send me an email to laura@sweetcinnamonroses.com if you have any questions.