
Disclosure: Some of the links below are affiliate links, meaning, at no additional cost to you, I may earn a small commission if you click through and make a purchase.
Let's talk about batting, basting your quilt and getting all ready to for quilting. Shall we?


Have you ever been to the quilt shop and wondered which batting to buy? Or did you wonder which of all the notions you really needed for hand quilting? I have definitely been there. The choice can be so overwhelming and dang, it's not cheap, so buying one of each wasn't really an option for me.
So. Let me talk you through a little. These are all the tips and tricks I learned over the years. It's been a long journey with lots of trial and error. And to be honest - in the end, I figured out that you don't actually need that much to make a fabulous quilt...
But let's start.

Before we really get into detail - let me quickly talk to you about the basics.
Your quilt is basically a sandwich consisting of three layers: your top, then comes a layer of batting (also known as wadding) and finally your backing. Make sure the "nice" or right sides of your fabric are facing towards the outside. Then all three layers will be basted together - usually with basting pins, spray or basting stitches - before you start quilting. Finally, you have to decide if you like to quilt either by hand, or by machine, and I promise you, hand quilting is not that hard but is instead super fun and very much addictive. You can totally do it! Even as a brand new quilter.
But let's dive right in! Shall we?


Batting. It's all in the batting and dang, I tried so many. Most of the time I wasn't happy, either with the texture of the finished quilt or the overall quilting process being super painful. Wrangling a huge/puffy quilt sandwich through your household sewing machine is proper work and harder than you might initially think. Also, I don't want you to be put off quilting just because you didn't enjoy the actually best part of quilting - the quilting!
After many years of trying to find the perfect batting, I tried Warm 100 and I am super impressed with it. Not only is it lovely to hand AND machine quilt. The texture of your quilt is divine. They are suggnely and soft. Wash super easy and keep you nicely warm at night, without making you sweat either. And probably the best argument - they are quite inexpensive as well!

My daughter scrunched up one of my scraps in this picture - her little hand is easily holding 8 layers of Warm 100. That's how soft it is.
Ohh, and before I forget to mention - you can easily also go for Warm and White, if you can't find Warm 100. The same company and the batting is pretty similar.
Batting obviously comes in all kind of sizes, but please make sure to buy enough. You need about 2"- 3" in wiggle room once around your quilt. But if you happen to have some left over, or even quite a bit, please don't worry too much. You can easily 'Frankenstein' batting together using batting tape. Simply follow the instructions and create a large piece of all your small left overs.
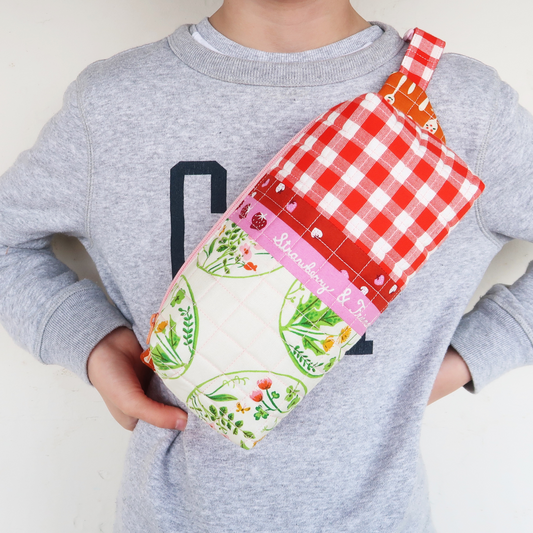
Or even better, make bags and pouches from it. I usually use mine to make pouches and add adorable little stitches. Just like the notions pouch - you see more of it further down.

But you can make all kind of projects with it. Use them for drawstring bags like the Wee Braw Bag, mini quilts or wall hangings and of course all the zipper bags. Whatever your heart desires really.
Here, a couple further characteristics you might want to consider when buying batting. I know, there are a lot of different ones out there and if this is potentially too much for you just now - I can definitely recommend Warm 100. As I said, it's easy to handle and the end result is a dream. After making a couple quilts I strongly recommend to try other battings though. Maybe you'll figure out that you're really into lofty quilts or want to go fully bamboo...
Don't let this put you off. Soon you will be able to judge which characteristics you like to tweak for your next quilt.

However. Next up. Basting your quilt. There's basically three different ways of basting your quilt. First, you can baste it by hand. Take needle and thread and baste all three layers together using a really long basting stitch.
I am usually too lazy for that, so the second way is to use pins...

Again, set up your Quilt Sandwich and baste all three layers together using these pins. They are slightly curved - helping you to even pick up the last layer of your sandwich. You have to kind of trust your needle to scoop it all up as you are doing this job semi-blinded. But these sharp pins are amazing and I have never had an issue. My preferred method!
Also, one thing I've never used before, but that's totally up on my Christmas list, the Kwik Klip. That tool is apparently amazing and helps sore fingers to get all those pins onto the quilt. A real game changer from what I've heard, but I yet have to try it for myself. If you've ever used it, please tell us in the comments below if you also love it.
Finally, the third way to baste you quilt, is spray basting. Another super easy way to keep all your layers together. Especially if you plan to go for an intricate quilt design and need to do loads of marking on your quilt. Sometimes pins can be a little in the way but if you spray basted it, marking is a total breeze.
Ok. So, you got your quilt basted together (either using stitches, pins or spray) and you are ready to start quilting. Now you have to decide whether you'd like to go for hand or machine quilting. Or a mix of both.
Let's start with machine quilting. Shall we?

These are my go to tools and threads for machine quilting. But let's start at the beginning.

And as we were talking about marking your quilt earlier - you will need rulers. Dang, I just can't have enough of them. I have them in all kinds of shapes and sizes and I don't want to miss any of them.
But for prepping your Quilt Sandwich, the long ones come in especially handy. The longer they are, the less often you have to move around your ruler to draw your design onto the quilt. Makes sense, right?

Together with your ruler you will need some kind of marking tool. But PLEASE stay away from ink or friction pens at this point. I know, I know. Many of them claim to disappear completely, but I've heard so many horror stories that the ink actually reappeared, sometimes in the cold or after washing, and that would just be such a shame. Nobody needs to see all your scribbles, right?
So. Please stick with these. Either use a Hera marker. It's a super nifty tool only leaving a little crease on your quilt that definitely vanishes with the first wash. It also comes in handy with so many other sewing projects. I loooove my Hera marker to bits, even though it's a rather simple little tool. Or use chalk based pens. There is a variety out there, just use whichever you like best.

For machine quilting you can of course, either use your standard sewing foot OR use your walking foot. Again a real game changer for me. As you know, your machine comes with feed dogs underneath your stitch plate that transport the fabric for you nice and evenly. But when it comes to quilting, you have all those layers and your machine can struggle a little to move them all smoothly. That's where your walking foot comes into play. It also comes with a little "foot" that transports your fabric from the top. So now, your feed dogs as well as your walking foot are moving your quilt through your machine for the most even result. And you don't have to worry that your layers badly shift without you even noticing. And the best of it - most machines already come with a walking foot!
Not pictured, but something that also is totally on said Christmas list - are some quilting gloves. So many quilters swear by them and say that they really help keep control over your quilt while feeding the sandwich through the machine. Dang, I really want to give them a try myself. I bet my back will thank me...
Together with your walking foot, you might want to use your quilting bar. It's basically a little metal bar that neatly slots into your walking foot. You can set the distance of the bar to then trace your marks of previous seam lines. Super handy and quickly installed. Again, most machines come with a quilting bar as well.

Getting towards the final stages, let's talk about thread for machine quilting.

You all know I am huge fan of Aurifil and I am totally converted. Never using anything else anymore. I know they seem pricey at first glance but breaking it down to the meter on a spool, they actually cost the same compared to their competitors. But Aurifil is definitely more amazing. Less lint, they hardly ever snap and the colours are a dream. Bonus. My machine loves Aurifil and I wouldn't give her anything else.
So, for machine quilting I mainly use the following two thread weights. Aurifil 50wt (the orange spool) if I like the quilting to nicely blend in, putting focus on the quilt's fabric and overall texture. If instead I want the quilting to stand out a little more, I use Aurifil 28wt (the grey spool). It's slightly thicker thread and the texture it provides is divine. A bit of a 'cheater' quilt as it almost feels hand quilted - but of course, much faster done on your machine.

Both of these quilts are quilted using Aurifil 28wt and the texture is divine. If you like to see more pictures of my "wrap them in fairytales" quilts, please have look over here.
Ok. Now, let's talk about hand quilting. Dang. My favourite part of making a quilt.

Ok. Now you know the ruler, as well as the marking tools. But thread weight is different for hand quilting than it is for machine quilting.

For hand quilting I loooove to use Aurifil 12wt (the red spool). It's absolutly wonderful. It never snaps, hardly tangles and the texture is just divine. I love chunky big stitches and I love that they don't have to be all even. The imperfections in hand quilting really make the difference.
For hand quilting you will definitely want to use a thimble. Nobody likes red raw fingers - so make sure to protect your fingers tips from getting numb. I like this one in particular, as it nicely fits my fingers. Dang. And it's pink. Or all kind of other colours if that's more for you.

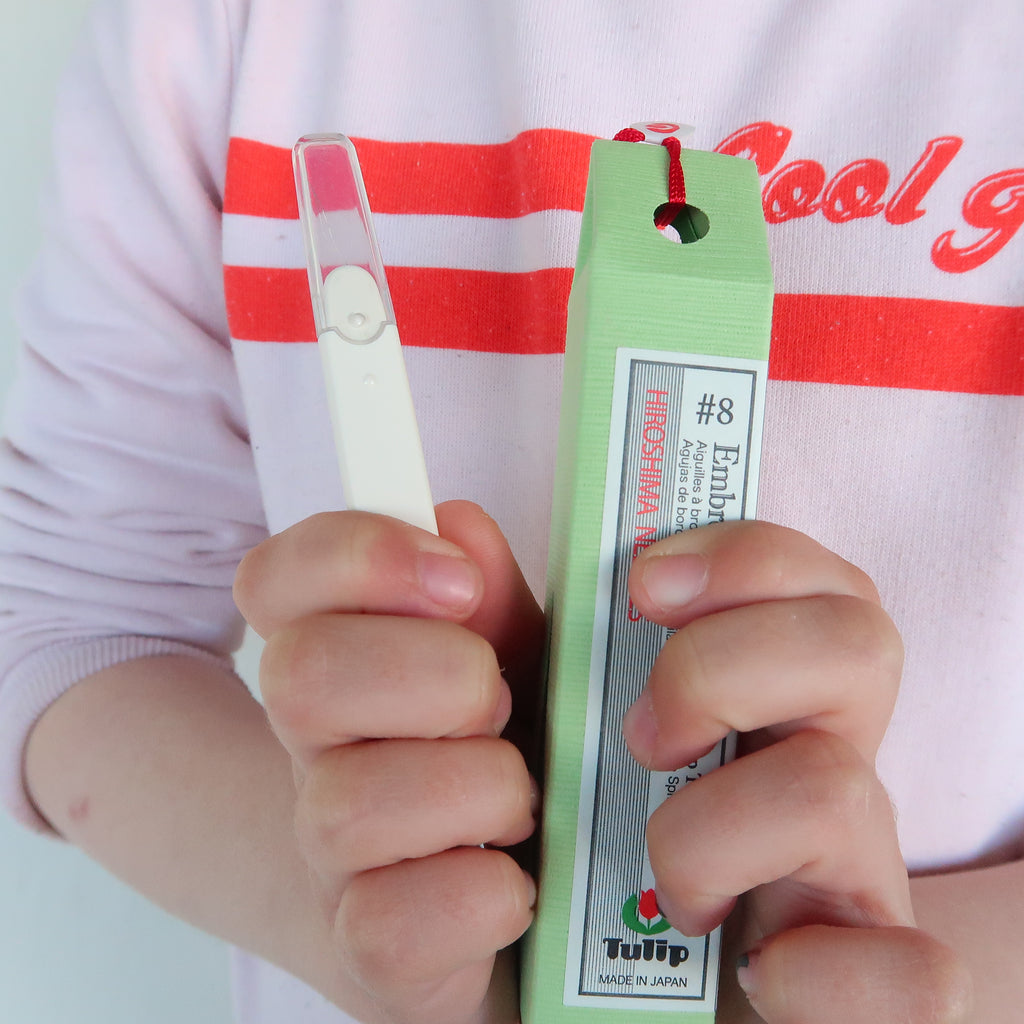
Finally. Let's talk about needles. There are so many out there. And they all do the job. Right. It's just a needle after all. Or is there a difference?
I think there is. These Hiroshima ones are super pricey. I won't lie. They are an investment, or just do it like me and put them on your Christmas list. They are super sharp, don't go dull as easily and I can manage 4-5 stitches in one go. Also. They come in this little glasswork veil and feel super lush.
Together with a needle. You might want to buy a needle threader. Super-duper cheap, but it will save you a lot of time and you don't need to concentrate on re-threading your needle - you can keep your focus on Netflix instead. Just saying.


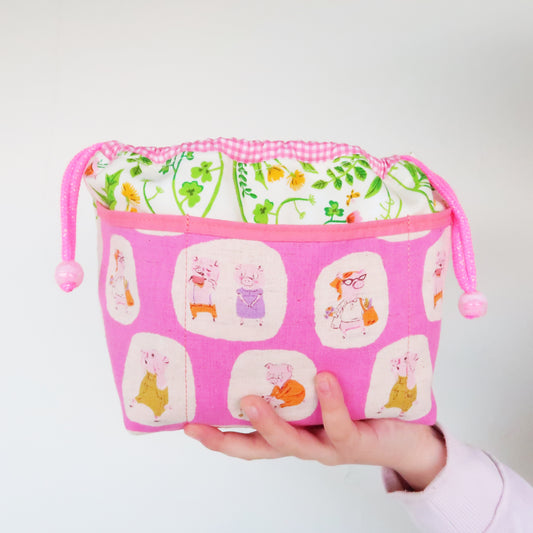
So. Here again is my little pouch, with all my hand quilting notions. My little pouch of treasures.
But I feel I have to warn you again. Hand quilting is totally addictive and just like me, you probably won't be able to stop again. Always craving for the next quilt.
That's it I feel. A good introduction into batting, basting and all you need to get ready to quilt. If you have any questions, please feel free reach out to me or leave me a comment below.
Laura x
------------------------------------------------------------
This blog post contains affiliate links, specifically I am a participant in the Amazon Services LLC Associates Program, an affiliate advertising program designed to provide a means for us to earn fees by linking to Amazon.com and affiliated sites. I will never post a link to a product I do not personally recommend. If you click on an affiliate link and then proceed to purchase something from that affiliated website, I receive a small commission. This helps me continue to provide high quality, free content. Please send me an email to laura@sweetcinnamonroses.com if you have any questions.
2 comments
I couldn’t do without my Kwik Klip! It saves me from sore fingers and hands. I also use small straight golden safety pins as they’re softer than silver-coloured pins and also don’t rust.
The KwikKlip is brilliant! I have had mine for some years and could not pin baste a quilt without it. You must give one a try. xx