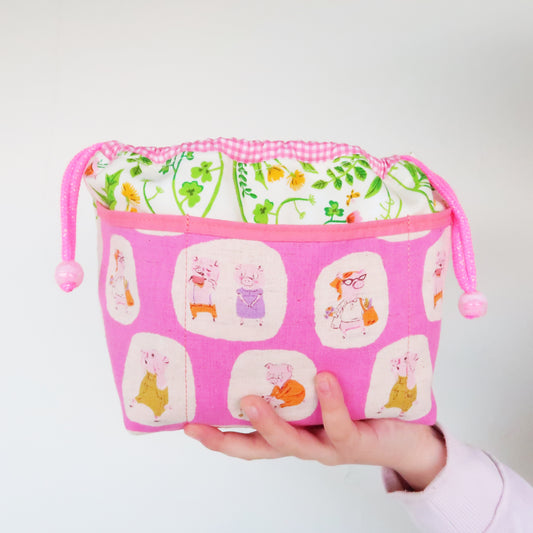
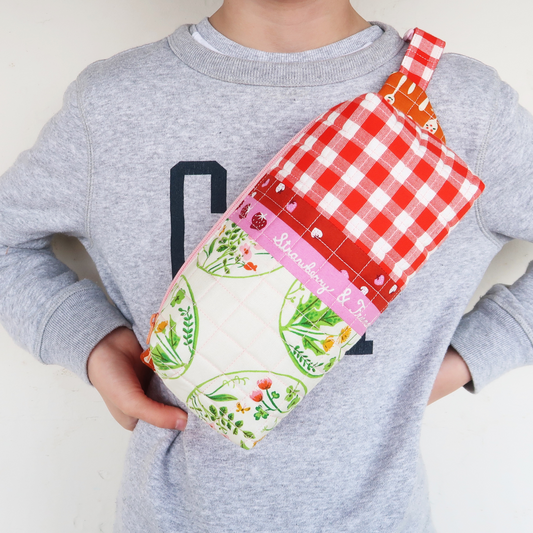
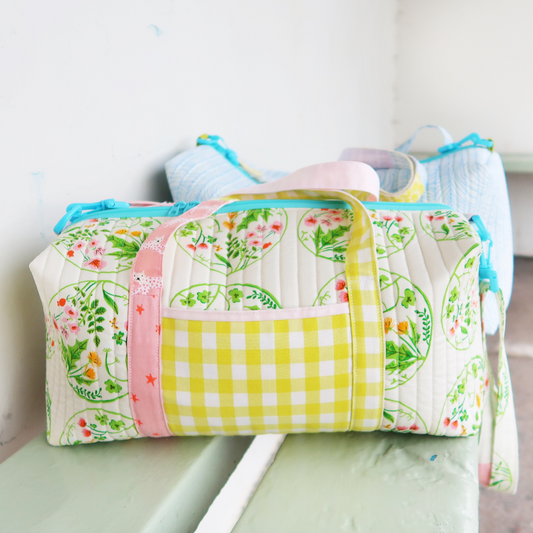
I am so excited about this one!!! My latest pattern is here - the Happy Happy Bag!
The best thing I've ever made. Definitely for a very long time. I am so, so, so excited about this one.
Ok. Let's get started.
Disclosure: Some of the links below are affiliate links, meaning, at no additional cost to you, I may earn a small commission if you click through and make a purchase.
About the Happy Happy Bag
The Happy Happy Bag is an open wide, boxy pouch. Similar to the Quilted Boxy Pouch but constructed in a different way - making sure it's opening all the way.
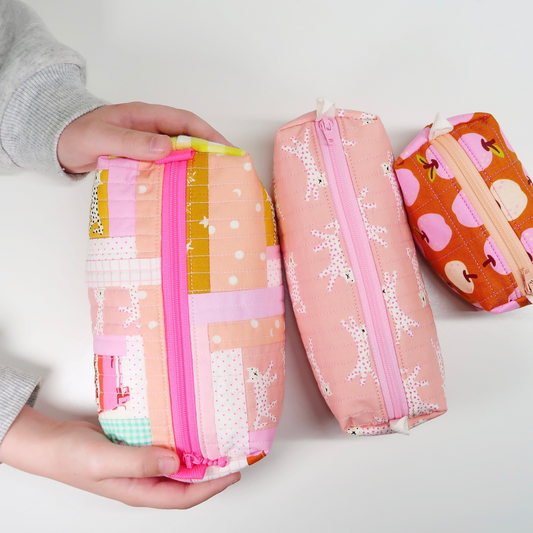
The pattern comes in three sizes and three styles. You can make a whole cloth version, create a patchwork bag or make a Happy Happy Teddy! Apparently teenagers love the teddy version... and I have to admit, it's so cute. But more about that in a minute.
Happy Happy Bag Quick Facts
You can get your copy of the pattern right now over here.
The pattern is suitable for beginners and everyone new to bag making. I promise, it's easier than you might think to insert a zipper properly.
And here a couple key points:
- pattern comes in 3 sizes and 3 styles (whole cloth, patchwork and teddy)
- Happy happy Bag is fully lined yet no binding to install on the inside
- Bonus video tutorials walk you through every step of the process
The digital Sewing Pattern can be downloaded instantly and you don't have to print out any templates, meaning you can start straight away. Making it super accessible.
Video Tutorial
Next to the Sewing Pattern you can also following along the bonus Video Tutorial. Perfect for all fellow visual leaners, please see for yourself how easy it is to make your very own bag. It's truly so, so easy.
Watch the video tutorial right here!
And of course make sure to follow me over on YouTube for more.
I share how to make the bag from start to finish. Super slow so you can easily sew along with me.
And now... if you're new to Teddy - I've also created a dedicated video showing you how to make the Happy Happy Teddy. As there a couple things to consider when it comes to sewing fluffy, stretchy materials.
Sewing Pattern
Now let's talk about the pattern a little more.
This is what you'll get.
The pattern comes in three sizes and three styles (whole cloth, patchwork and teddy). My favourite one is the teddy version... but I am sure you'll have a fave one as well.
Finished sizes (all in wxhxd):
- Happy Happy Bag: approx. 7" x 2.5" x 3"
- Happy Happy Mini: approx. 5.5" x 2" x 2.5"
- Happy Happy Teddy: approx. 8.5" x 3.5" x 4"
And as mentioned above, the bag comes in three styles. Whole cloth ( = using only one piece of fabric per section) and patchwork ( = piecing together smaller pieces to make your panels) and teddy (more on the teddy material below).
The step by step sewing pattern comes with a ton of pictures, tables, instructions and links to helpful video tutorials. I promise you, it's like I am sitting right next to you. Again, this project is made for beginners in mind. Or kids. Whoever wants to learn making cute things with their sewing machine.
Materials for your Happy Happy Bag
Let's talk about materials. Shall we?
You can totally make a Happy Happy Bag with things you already have at home. Fabric, left over batting and a zipper. No need to buy anything new. But of course - if you like to make the Happy Happy Teddy version, I would highly suggest to go and buy some quality material (but more on that in a minute).
Before we cover the Happy Happy Teddy, let's cover all the materials for the whole cloth and patchwork version.
So here we go.
Next to a copy of the pattern, you will need fabric, thread, left over batting from your last quilt, a zipper and your basic sewing supplies.
Fabric I like using quilting cotton but of course you can opt for stronger fabric like canvas or denim. Whatever you fancy really.
Thread Any thread will do. I like a combination of classic Aurifil 50wt for construction and 28wt for all visible seams (top stitching along the edge and machine quilting).
Batting Left over batting from your last quilt will do. I like using this one, but whatever you have at home will do!
Zipper. You will need a zipper (for the Happy Happy Bag it's 11" or longer, the Happy Happy Mini it's 9" or longer and the large Happy Happy Teddy it's 13" or longer). I like to buy them in bulk and use them for everything.
Zipper charm. There's all kinds of cute charm out there but I'm recently using these cute bunnies (you can get them in the US, China and UK) and I am in love with them. They also have stars and bears, something I yet have to order myself. Soon!
Ribbon. Totally optional but I think it's a cute way to personalise your bag. I particularly like this stretchy ribbon at the moment but again, you can totally use what you already have at home. Or make one out of scraps yourself.
Basic Sewing Supplies You will need your sewing machine, rotary cutter, cutting mat, ruler, hera marker, pen, binding clips, scissors and maybe a seam ripper (just in case).
And of course. If you're planning to make a patchwork bag, you will need a selection of prints. But I am sure you have plenty of those at home. Everything you probably have laying around already. No need to spend more money on stuff.
Materials for your Happy Happy Teddy
Now let's talk about the Teddy.
A while ago I've seen one of the new and very posh cosmetic companies offer a free zipper bag if you spend a certain amount with them. A cute, cuddly teddy pouch and what can I say, I almost bought it. Not for the cosmetics but only for that bag. And literally just before hitting buy, I remembered that I can probably make it myself. Maybe even cuter...
And dang. I think it actually did turn out cuter.
But. It's been a bit of a rollercoaster. Don't wanna to lie.
I've ordered a whole bunch of soft, cuddly fabrics. And while I loved some, others were even hard to touch. According to my daughter, they even made her shiver (not in a good way though!).

And these two are my favourites.
The fluffy teddy with bigger loops (in cream but I like to try it in a darker brown next). All cuddly and super cute. Yet not feeling like plastic and making you shiver. This one is a little harder to work with as it's quite thick and does shed a little - once your bag is finished, the shedding stops though.
And then this thinner teddy. This one is almost like felt but a little more soft and super easy to work with. Not as soft as the other one but a dream to work with.
I can highly recommend both of them!
And then... making the Happy Happy Teddy complete, I've added little charms to my zipper. These bunnies are adorable and I've checked, they also have little teddies, that I plan to get next.
When it comes to making your Happy Happy Teddy, you won't need any further interfacing. The bag will be softer and great for all your toiletries or sewing notions.
How to work with Teddy Fabric
Next to your pattern, please make sure to watch the Sewing Tutorial for the Happy Happy Teddy over on my YouTube channel (and subscribe if you haven't already). There I show you step by step how I make my Teddy version.
But here again a couple things that I've learned.
Stretchy
Your Teddy will most likely be a little stretchy. Saying that, the one's I've worked with were actually not too bad. There was no need to change either my needle or my stitch (into a straight stretch stitch). I just continued with my normal settings.
So. Same needle, same stitch, same tension.
But as a tip. When it comes to inserting your zipper, I would highly recommend having the teddy fabric at the bottom, getting it transported by your feet dogs. This will help feeding through your teddy as even as possible.
Thread
Thread wise I would recommend using Aurifil 50wt (or your standard sewing thread). Both for the construction of your bag as well as for topstitching along the zipper. Here you want the thread to "melt" into your teddy and not be seen.
And that's it, really.
Sewing with teddy fabric isn't as hard. The only real downside is that it can get a little messy while you're dealing with raw edges. Once the bag is done - all those edges disappear into the inside of your bag. And the fluff will stop.

Best Part of the Happy Happy Bag
Now the best part of the Happy Happy Bag. Not only is the bag super cute, opens wide and is easy to make. You will also find no raw edges or binding on the inside!! Yes. You've heard that right. NO BINDING on the inside.
Meaning it's even quicker and easier to make. No fiddly binding to install. And of course, no edges around your lining or your zipper.
Dang... I don't want to step on my soap box. But I hate seeing patterns constructed in a shady way. Zipper edges not covered. Like WHAT?!
Zippers are easy. And I've done the work for you, making sure it all neatly works out so you don't have to live with raw edges or binding. Quick and easy. That's what all patterns should be. Ok. I've finished my rant.
And that's a wrap, my friend. The Happy Happy Bag and I hope you'll love it as much as I do. And I looooove it.
Ohh and of course, if you have any questions please don't hesitate to reach out. I am only an email (laura@sweetcinnamonroses.com) away and here to help. Even though I know you can totally do it!!!
As always. I hug your face.
Laura x
------------------------------------------------------------
This blog post contains affiliate links, specifically I am a participant in the Amazon Services LLC Associates Program, an affiliate advertising program designed to provide a means for us to earn fees by linking to Amazon.com and affiliated sites. I will never post a link to a product I do not personally recommend. If you click on an affiliate link and then proceed to purchase something from that affiliated website, I receive a small commission. This helps me continue to provide high quality, free content. Please send me an email to laura@sweetcinnamonroses.com if you have any questions.


