

Embrace the freedom of improv piecing - maybe with a little bit of a plan...
Improv piecing is all about fabric placement, intuition and letting go. One of my absolute favourite quilting techniques - creating something perfectly unique. Every single time. I love improv piecing especially for featuring my most precious prints: framing the motif using my very own technique called "improv fussy cutting" and then adding precious stitches by hand. Those panels are perfect to be turned into a pouch or bag - but of course you can also make an improv pieced quilt... or whatever you desire!
You don't know where to start when it comes to improv...? Let me show you exactly how I am doing it. I'll give you all the tools and techniques to create your own improv panel with confidence!
Shall we get started?

Disclosure: Some of the links below are affiliate links, meaning, at no additional cost to you, I may earn a small commission if you click through and make a purchase.
There are two main techniques when it comes to improv piecing: either go with straight lines using your ruler + rotary cutter or embrace the absolute freedom and create curves "freestyle" only using your rotary cutter. Or why not use them both in one project like I've done here...

And the other side...


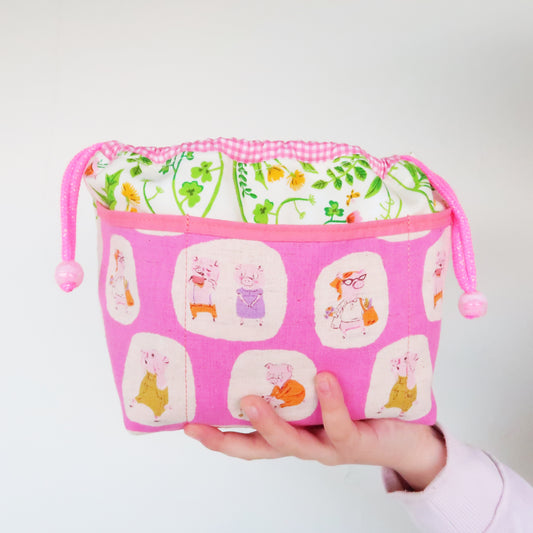
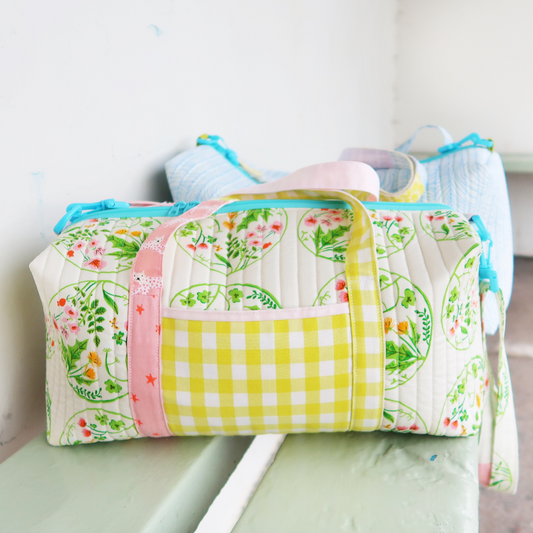
And my daughter was so kind to agree to also show you how to use the pouch... You might have guessed it - the zipper pouch has an inside!


About Improv Piecing...
Improv piecing is all about letting go... but there is also a technique behind it. A couple basics to guide you through the process, giving you a good start into your journey of freestyle... Something I wish I had known before attempting my first projects. Ha! Let me tell you... there was lots of trial and error!! But I love it now and I even came up with this very unique technique of improv fussy cutting - my favourite way to feature a fabric motif! I can't wait to show you.
Let me share the basics of improv with you. There are two main ways of piecing: angles and curves and we will cover both. One technique per pattern.
Ok. Let't talk a little more about Improv Piecing (angles). Are you ready?
- Improv Piecing (or angles) is used to create neat sharp lines. You will need a cutting mat, rotary cutter and ruler.
- I share my own, very unique technique of "improv fussy cutting" with you - featuring one motif at the centre and then we build the panel around it!
- Finally I will show you how to quilt the panel by hand and how to turn it into a fun zipper pouch (size will vary depending on your improv panel).
Now let me share a little more about Bonnie Curves (improv curves).
- Bonnie Curves (or improv curves) is all about creating curved seams. Embracing the ultimate freedom as you'll be cutting your fabric freestyle. No ruler. Just a cutting mat, rotary cutter and you!
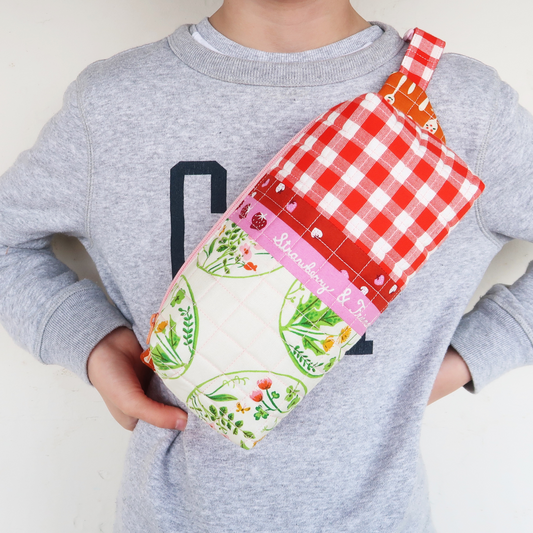
- I will also show you how to hand quilt your panel and how to turn it into a drawstring bag measuring approx. 8"(w) x 9"(h) x 3" (d).

And if you're wondering about the patterns - let me tell you more about the actual patterns. Shall we start?
- The patters are both digital files (PDFs) and you can easily get your copy from my shop. After purchasing your copy they will be ready for instant download. Make sure to save them and you're ready to go. Super easy!
- Improv Piecing as well as Bonnies Curves are both improv patterns. Improv piecing isn't a precise science; it’s about the journey. You might not end up with exactly the block you imagined at first. And that is ok. Be open and embrace the beauty of randomness you achieve with both techniques. Those patterns will not teach you how to make the exact blocks I made but they will reflect you and your personality.
- There is no need to print it unless you wish to do so, as there are no templates needed. So you can start today!
- Improv Piecing is consisting of 11 pages and Bonnie Curves is consisting of 8 pages, each including loads of inspiration, pictures, detailed instructions and graphics. I carefully talk you through, step-by-step. It's like I am sitting right next to you - cheering you on!! Your improv bestie all the way. I wrote the pattern with absolute beginners to improv in mind but if you are a confident maker, I am sure you'll still love making them discovering a new way of how to approach your next improv project.
- Both patterns are a great start into improv but then I like to encourage you to move on. Discover new arrangements, styles and ways to piece your fabric. There are literally no limits!
If you like to know more about teaching classes or your local guild, selling finished bags, need more information on buying, saving and printing the pattern - please hop over to my FAQs, there I try to answer all your questions in more detail.

Materials needed...
Before we start improv piecing, let's talk a little about the materials you'll need. Shall we?
First of all - you will need your copy of the pattern which you can find in my shop (Improv Piecing and Bonnie Curves). No need to print anything, unless you wish to do so. So you can start straight away picking your favourite prints...
And here a list with all the things you'll need:
- Improv Piecing and/ or Bonnie Curves pattern
- Rotary cutter, cutting mat and ruler
- Fabric
- Batting
- Cord and zipper
- Thread
- Needles and needle threader
- Sewing Machine
Rotary Cutter, Cutting Mat and Ruler:
I am sure you already have all the basic sewing and quilting tools at home but if you don't please make sure to invest in a good set of basic tools and notions. You want to make sure they work fine and you are safe when handling a rotary cutter. Also - good tools make all the difference I think... Don't let a blunt blade or small mat ruin the fun for you.
First about the cutting mat. Make sure you get yourself a large mat - nothing worse than having to move the mat whilst you're cutting. I only have a very small sewing space (and tiny table - no designated cutting table or anything fancy) but I have a large mat always sitting under my machine. So whenever I have to cut, I just do it next to the sewing machine and for larger cuts I move the machine just a little. It works really well. If you like to treat yourself - a rotating cutting mat is a neat thing to have as well... *hello birthday pennies*
Very similar thing counts for your ruler. Make sure to have at least one large ruler. Smaller ones and specialist rulers are great but having a long basic ruler is priceless. Well, maybe not priceless as they are not cheap but dang... so worth it.
And finally you'll need a rotary cutter. Personally I prefer the large 45mm ones but for smaller projects a smaller blade might be handy (saying that - I only have this one size and never felt the need to own a bazillion rotary cutters...). But make sure to get yourself one that you like and sits well in your hand, you'll be using it a lot...
Fabric:
You will need fabric. I like to use a couple of my favourite prints like Crafty Chloe as the focus point of my project and then I am using lots of basics prints for framing. I talk about fabric placement down below if you like to know a little more...
As always, I highly recommend using what you have at home. Improv piecing is also a great way to use up some of your scraps - no scrap should ever be wasted... But of course - if you need an excuse to go fabric shopping. You go girl!
Batting:
After finishing the improv panels, I like to quilt them by hand. And for more structure and depth of the project - I am using batting (usually scraps I have left from my last quilt). I really like the structure of warm and white for my quilts and I think they work really well here as well but of course, anything lofty or fleece will do.
Cord and Zipper:
Depending what project you are planning to make from your panels - you will need either a zipper for a zipper pouch or some kind of cord for a drawstring bag.
As these projects have a such nice structure (after you quilted them by hand) you might want to use a metal zipper to give them a worthy finish. Usually I recommend buying plastic zippers in bulk for quick projects - but here I would highly recommend buying a range of metal zippers in different colours and sizes. It's always nice to have a variety at home but here in particular. You won't be able to plan in advance how big your panel will end up - and you don't want the length of your zipper limit your creativity. Nothing worse than having to chop a beautiful block into a convenient size... I've been there and it was heartbreaking!
For cording you can use pretty much use anything. From home made to shop bought bias tape, woven tape to thicker cord or long strips of leftover knit (a little like Hoooked Zpagetti). Try them out and go with what you like the best!
Thread:
And this is where the fun starts. For this project I got to use all of my three favourite thread weights by Aurifil. Aurifil 50wt in dove for piecing the panels and construction of the project, Aurifil 28wt in fairy floss for topstitching and Aurifil 12wt in blush and orange mustard for hand quilting.
Let's talk about colour a little. For piecing a panel and assembly of a pouch/ bag - all seams that won't be visible later on - I am using a neutral colour. I have lots and lots of white and dove at home. And even though I also have other colours in 50wt - those are the basics that get used ALL THE TIME. Not exactly the same for 28wt. I am using the slightly thicker thread weight for topstitching and machine quilting - and I might have lots of it in a huge variety of colours (but shhhh... don't tell my husband). When it comes to picking a colour, I am always choosing a slightly lighter shade than the actual fabric. I like the thread to be a feature and seen but not distract from the actual project. Hope that makes sense... And finally Aurifil 12wt for hand quilting - again a huge variety for me, please! Even though I tend to use the lighter colours a lot more...
Needles and needle threader:
When it comes to quilting by hand I used to always use what I had on hand. Usually the standard needles you get everywhere. And yes... they did the job just fine. Just a needle, right? But then a sweet friend introduced my to these fancy, new Japanese needles she discovered. And dang... they are the best. Super sharp and they slice through any fabric, almost like butter. They are the best. I use them for everything now. From hand quilting to closing the seams of my bags and pouches. If I need a needle you bet it's a sharp little needle by tulip. Again - if you are about to treat yourself why not investing into some super sharp pins as well. And dang, they are also super cute...
Needle threaders are super cheap but a total must have. Especially if you have to concentrate on your fave Netlix show while quilting... *just saying*
My machine:
I am sewing on my Janome MC 6700p and I absolutely adore her. She's such a work horse whilst the seams are always super neat. And she loves Aurifil at least as much as I do...
And when it comes to improv piecing, there is one feature I love in particular. And that's the HP foot and corresponding HP plate. The HP foot always creates a perfect 1/4" seam allowance - no matter what. Just guide the fabric along the edge of your foot and the machine does the rest for you. Super precise. Always! And the neat thing about the HP plate is the position of the needle hole. It's only one small hole - directly underneath your needle (as you can't change your needle position using the HP foot and plate in combination). That guarantees that no fabric is ever "eaten" by your machine. Especially at the start if you plan stitching close to the edge, where your fabric is prone to being pulled into the hole of your plate. With the hole being super small - that doesn’t happen anymore! Such a treat and no more wrangling fabric out of the guts of your sewing machine...
How to...
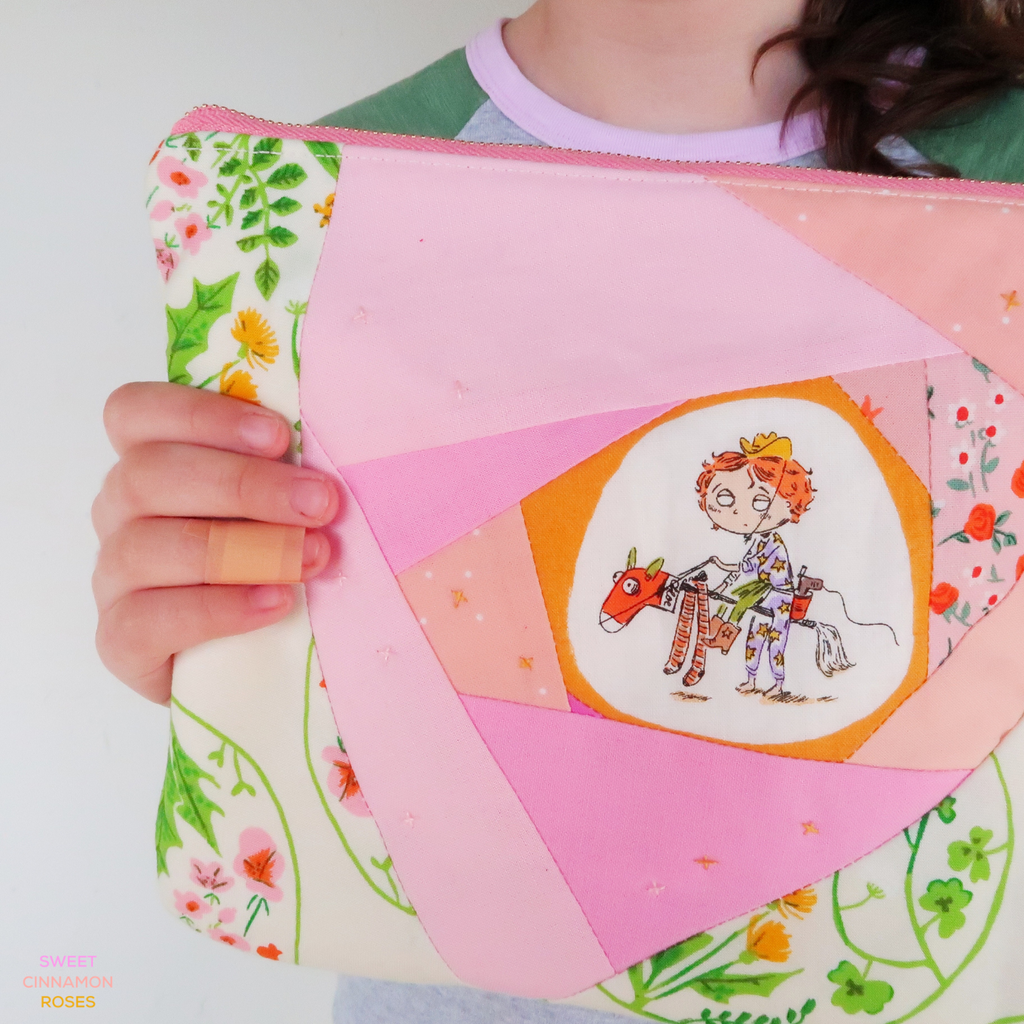
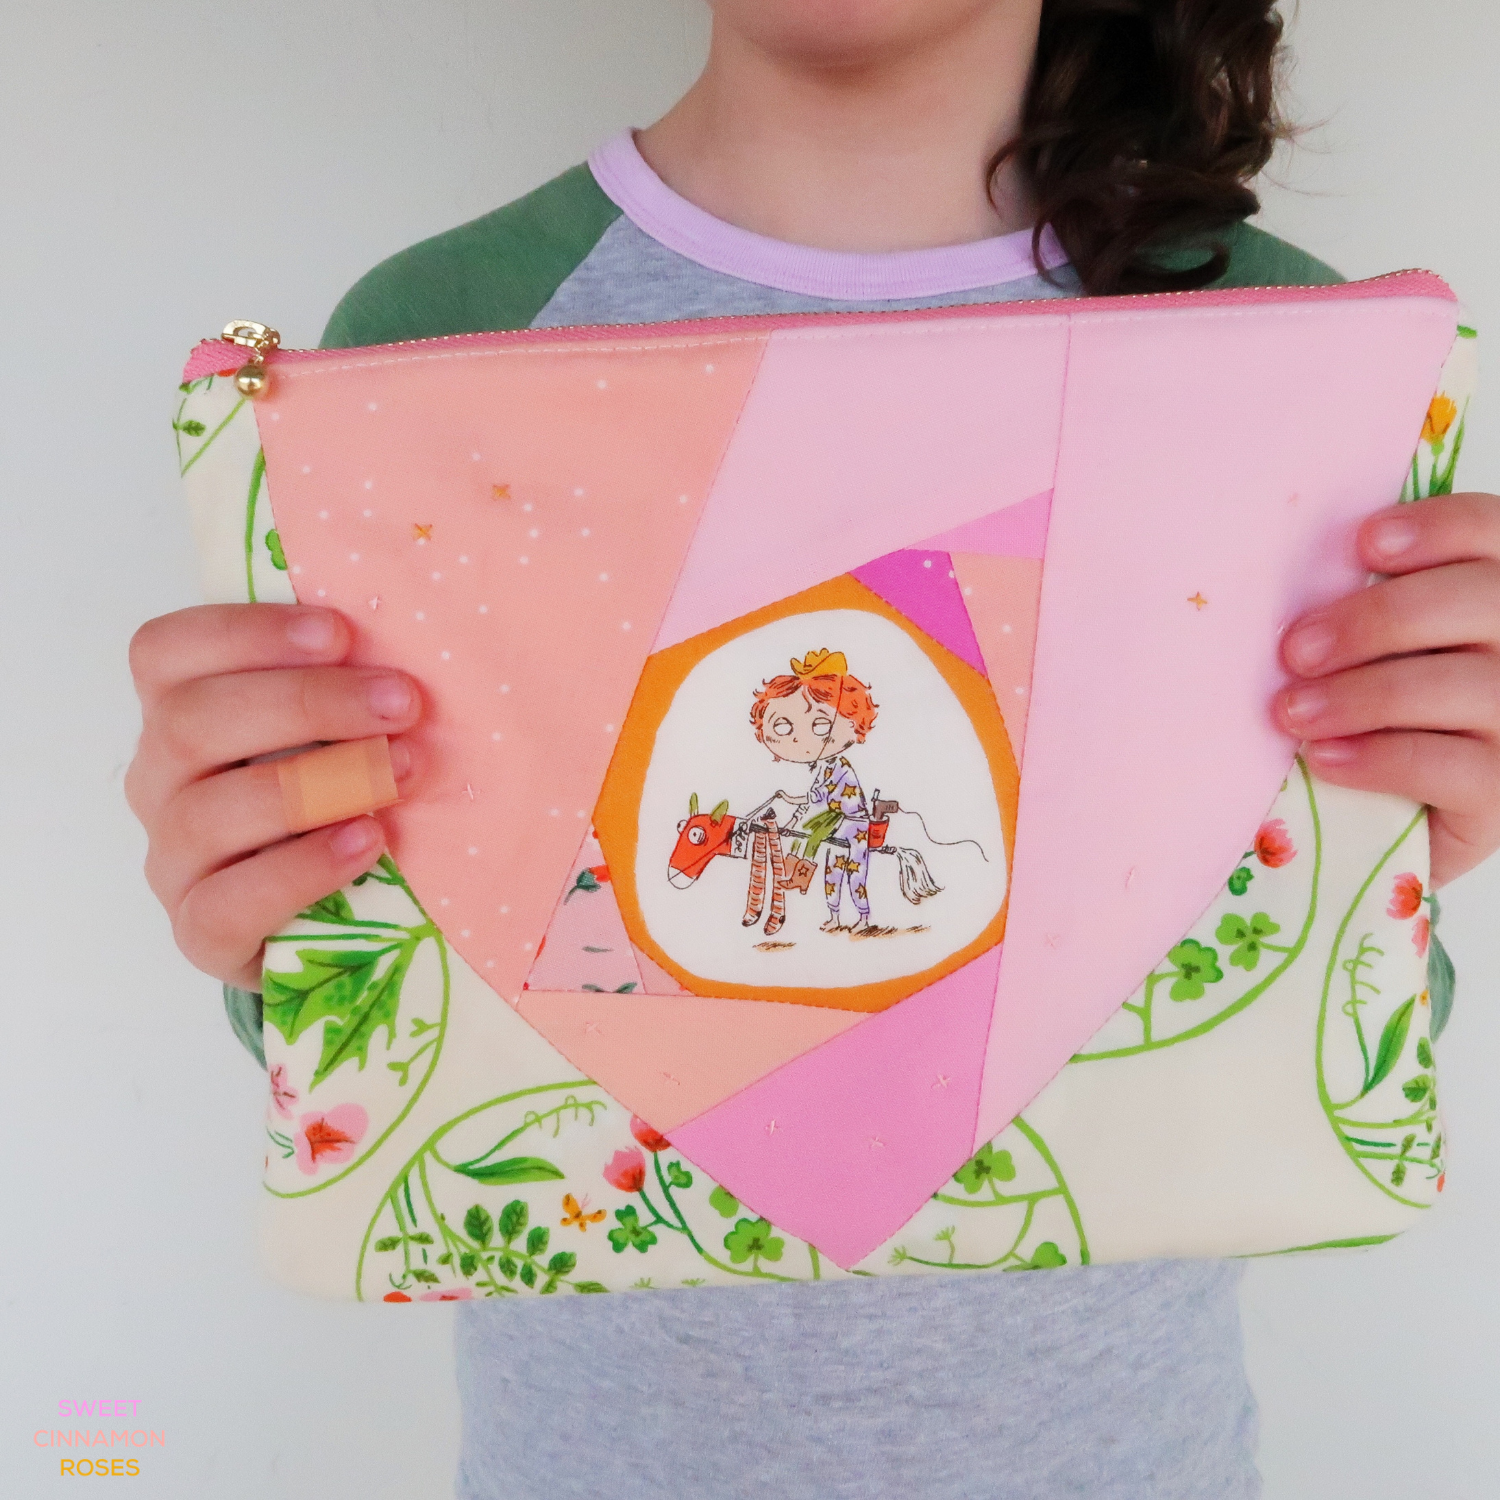
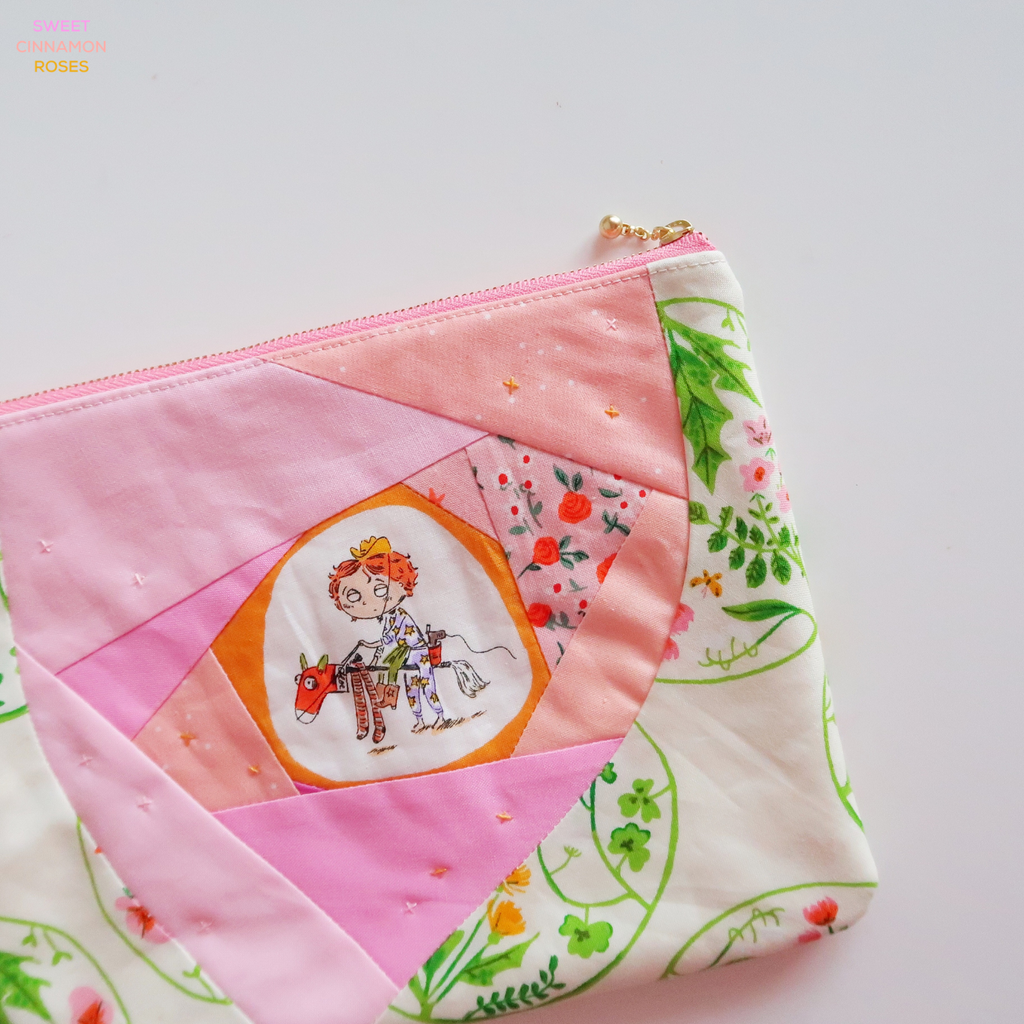
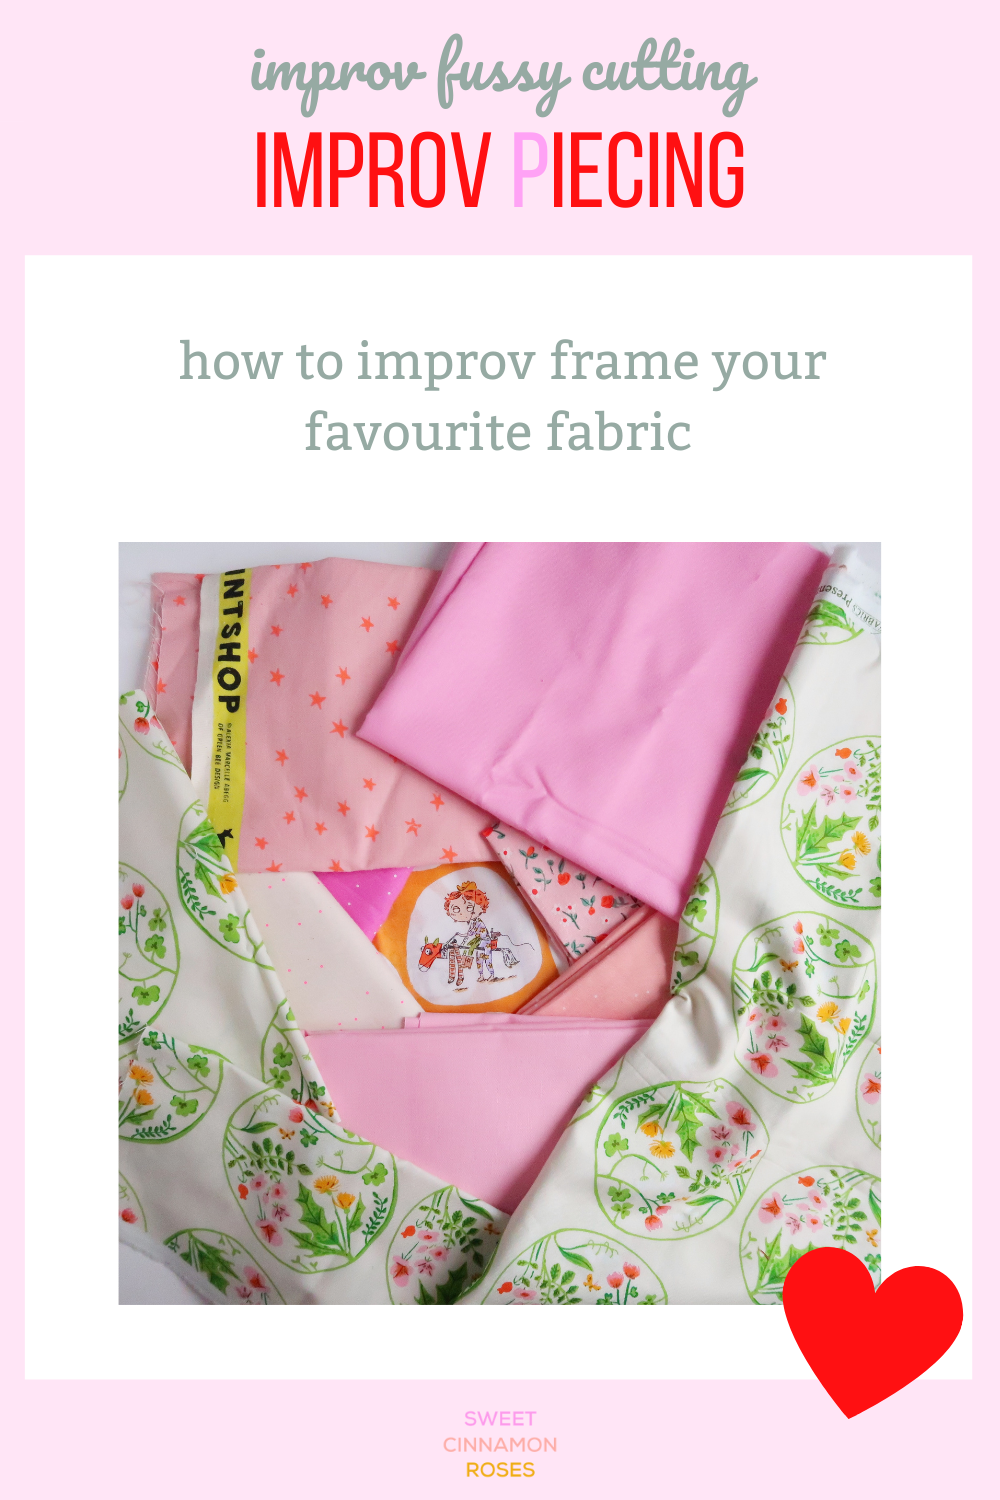
Improv piecing is all about being resourceful. Use what you have at home - from smaller scraps to wonky long bits from your last quilts. I usually like to feature one of my favourite prints in the middle when it comes to improv fussy cutting (remember, part of the angles pattern), here Crafty Chloe on her little horse is the focus point of my project. Small scraps would be amazing for this - something that is just too small to use otherwise. And then I frame her using some basic, non-directional prints...


So, this is my plan: I have Chloe in the middle, nicely framed using some corresponding fabric. She is the star of the show and the other prints are supporting her. Not distracting.
Here it is important to pick the right fabric for framing. First of all the fabric has to be non-directional. This is super duper important. You are improv piecing and want to go with your gut feeling - having a directional print forces you to think about fabric placement a little too much. It's about intuition (with a bit of a plan, right?). And second, go with rather plain fabric. Nothing too exciting as the focus should be on Chloe!

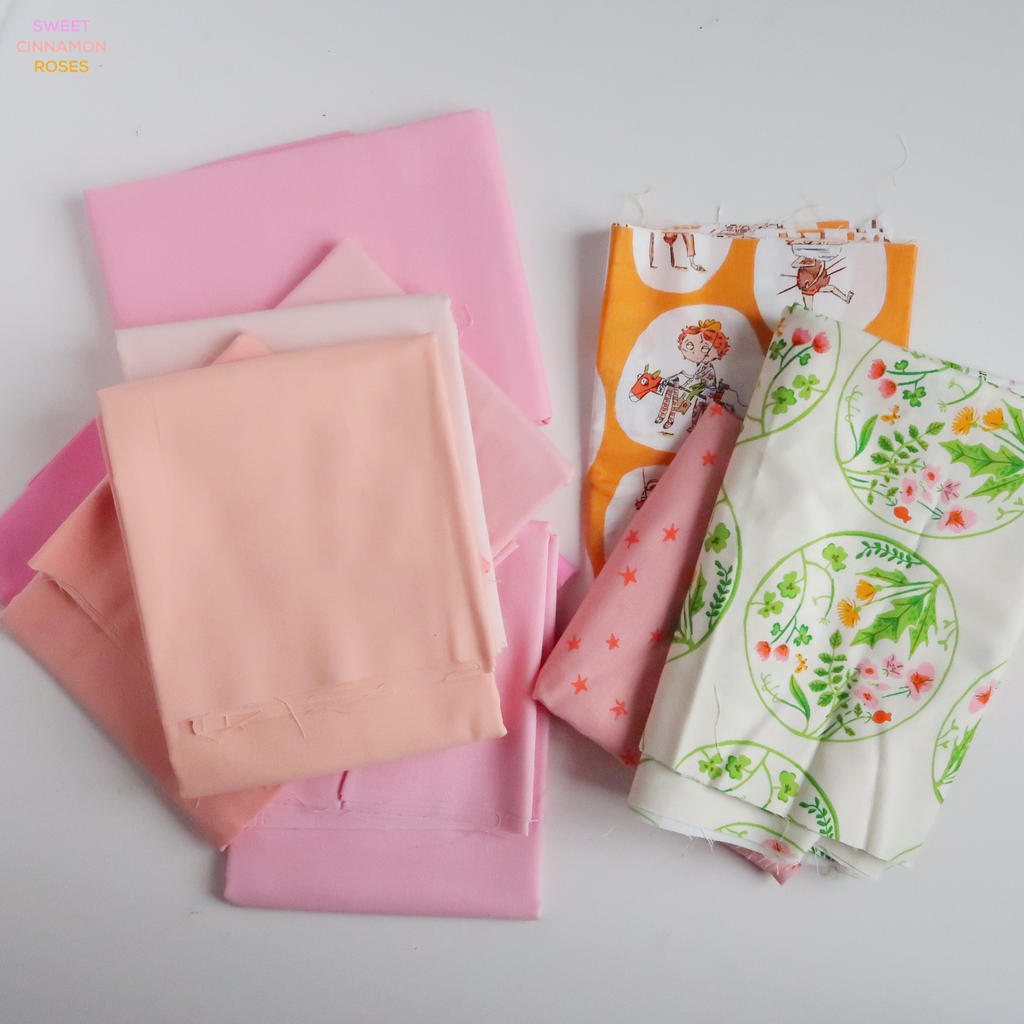
So here a couple examples. Some not-so-exciting, non-directional prints for you. Small florals, polka dots, sprinkles and stars work really well. And of course - use all your solids. They calm down the overall look a lot but still make the block shine!

And for the final frame - the curves in my case - I picked this floral print by Heather Ross. I know, it's a little more exciting but still calm enough I think to not distract from Chloe too much.
So. This was my initial fabric pull for the project. As you can see. I had a bit of a plan. I knew I wanted Chloe to be in the focus. And I wanted the orange around her "bubble" to be seen. Then I picked my non-directional, not-so-exciting prints for framing (as in improv fussy cutting). And finally I wanted to mix in some curves and picked the florals for that.
So I had a rough plan. An idea for the overall look of the final block but nothing that would limit me when piecing the block. And as you can see - I kind of made it. Both sides of the pouch are definitely different but close to my initial idea. What I mean to say is, it's ok to have a plan and you totally should think about the feel of your panel. But don't overthink it. If things change along the way - that's ok. You are the steward of this journey and every panel will be different. Will be YOU!

And now...
Now I really want you to go and have fun. Explore these techniques and develop your sense of (planned) randomness. You have now have all the tools to create improv angles and curves with confidence. Making your fabric shine in a completely new way. There are no limits to your creativity when it comes to improv piecing.
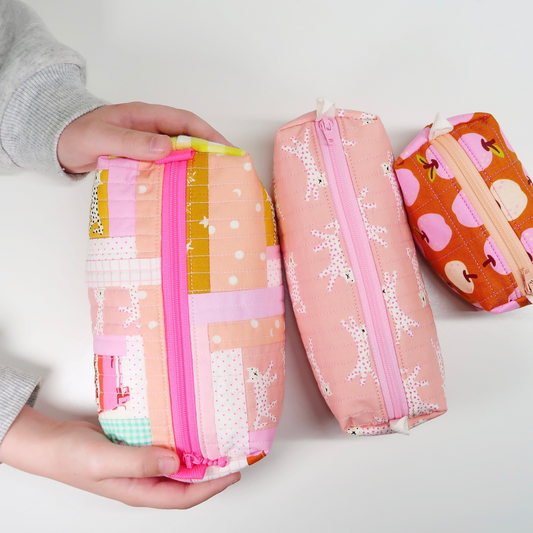
Create all the panels!! Use them directly to make a zipper pouch or drawstring bag as shown in the pattern. Or why not use them as a feature on another project? The Wee Braw Bag for example is a great project to use up some of those precious scraps you have... The front pocket of the Wee Braw Bag is a particular great spot to feature a small improv panel...
Head over to my post about the Wee Braw Bag to learn more about the best project bag out there. There I share all my best tips + tricks with you, a list of all the materials needed, lots of inspiration and the pattern itself of course.

Community...
And finally I'd like to invite you. Invite you to hang out with me.
And what's the best place to chat about fabric, notions, thread and your fave Netflix shows? Our own, private Facebook group!! There we can chat directly without barriers, I can answer all your questions and I get to see your amazing panels. So why not join me over on Facebook?

You can also find me over on Instagram and Facebook for even more inspiration. Or check out my brand new Pinterest page!
And finally I like to take the chance to thank Janome UK for working with me. I love my Janome MC 6700p and don't want to miss her anymore... So thanks Team Janome for having me!
Take care and Happy Improv Piecing!
Love, Laura x
This blog post contains affiliate links, specifically I am a participant in the Amazon Services LLC Associates Program, an affiliate advertising program designed to provide a means for us to earn fees by linking to Amazon.com and affiliated sites. I will never post a link to a product I do not personally recommend. If you click on an affiliate link and then proceed to purchase something from that affiliated website, I receive a small commission. This helps me continue to provide high quality, free content. Please send me an email to laura@sweetcinnamonroses.com if you have any questions.
1 comment
Hi, I really enjoy your blog and patterns (I have bought a couple of them already). I was just wondering if you are posting videos for sewing along. I remember seeing one from your weebraw bag but now I can’t find it. I’m not on Facebook , only on Instagram (scientistquilter) but no one seems to answer my questions on how to follow your videos. Is Facebook the only way to join your group? I closed my account a while ago due to their lack of policies regarding misinformation and propagation of conspiracy theories. Sorry it keeps bothering me this whole political issues in my country and the damage misinformation has brought. I would like to follow your videos but I don’t want to join Facebook again.
Thanks so much and I look forward to keep reading your blog and posts :)