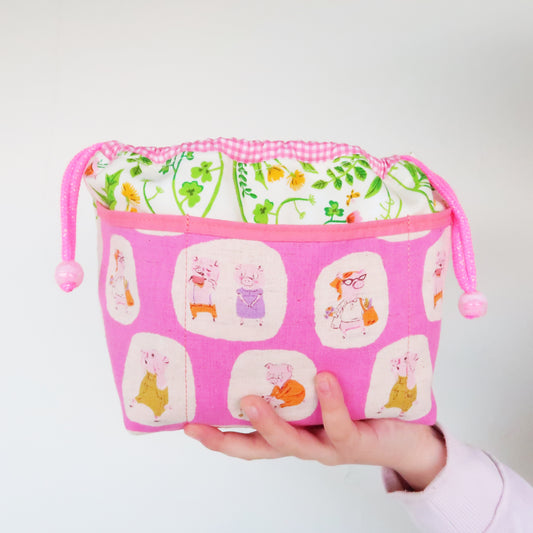
Did you know that the See It All Pouch was the very first pattern I ever wrote?! Probably not... let's be honest. That was back in 2016 and it feels like a lifetime ago... So much has happened since but this one pattern will always have a special place in my heart!
I vividly remember - back in 2016 I really wanted to make a cute little pouch for my daughter's Legos as they were flying around everywhere. Little did I know, it wasn't her who would be hugely into Lego but my son, who still refuses to go to bed without at least five little Lego people and a Lego spaceship. So back then I made this clear vinyl pouch for her and it was just perfect for her Legos. And then I made more and more - for my cosmetics on-the-go, pencil cases, sewing notions and so many just as gifts.

Disclosure: Some of the links below are affiliate links, meaning, at no additional cost to you, I may earn a small commission if you click through and make a purchase.
Ok, let me show you a couple I made this time around. I haven't made them in forever and almost forgot how fun they are!


As I wrote the original pattern back then in 2016, it was absolutely time for a wee face lift. Please don't worry, it's still the pattern you know and love but with new pictures and slightly amended instructions. I made it even easier for you to make your version of the See It All Pouch...
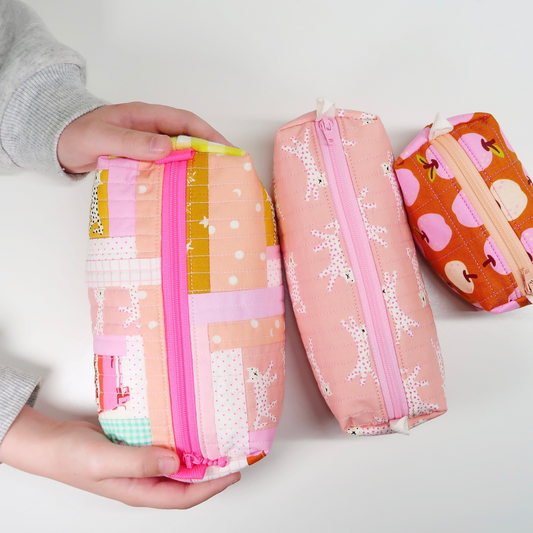
Ohh.. and of course. I added a size!!! So now the pattern comes in three sizes! The small one measuring about 4.5" x 4" (wxd) - that's the orange sea turtle one you can see above. A medium one measuring about 5" x 5.5" (wxd) - that's the yellow floral one. And a larger one measuring about 7.5" x 4.5" (wxh) - the tartan one.
Of course you can always easily amend the sizes. I carefully talk you through the pattern and you will pick up how to construct them in no time, from there you will find how easy they are to change in size and shape. Saying that though - I love how handy these three sizes are. I love the small ones for my cosmetics on-the-go or even plasters and cream when out with the kids. The medium one is great for tiny toys to organise and my absolute go-to size when it comes to gifting the pouch. I usually make them for new mums and their babies and fill them with all the things that usually get lost in huge nappy bags. And finally, the large one is the perfect pencil case. Probably my fave of them all. Just the right size for your stickers, notebooks and pens or even better all your sewing notions on-the-run.
I always always always have a small See It All Pouch in my everyday handbag with emergency items and a pencil case one in my WIP weebrawbag. A girl can never have to many bags - especially when she's sewing and stitching everywhere she goes!


Materials needed
But before we start sewing let's talk a little about the materials you will need. Shall we?
Ok. Of course you will need the pattern which you can find in my shop. It's a measure and cut pattern, meaning all pattern pieces are cut using a rotary cutter, cutting mat and ruler. There is no need to print it unless you wish to do so, as there are no templates needed. So you can start straight away!
Fabric:
You will need some fabric of course. I used Malibu by Heather Ross for these pouches but of course any quilting cotton will do. If you are anything like me you will have more than enough of it in your stash... (hidden under the bed - is that weird by the way??).
Zippers:
I always buy my zippers in bulk from this shop in the US. They are super quick to deliver and the quality is great. Hahaha, usually I only buy a pack of one hundred 10" zippers (and guess what - about eighty of them are "cotton candy pink" with only a handful ones of "bubble gum pink" and "grey"). They are my absolute go-to zippers and of course I use them here as well. But technically your zippers don't have to be 10" long. So for the small and medium one a 6" would do and for the large one you get away with using a 9" zipper. But as I love being efficient, I like to buy one big pack of 10" zippers for literally all my projects!
Interfacing:
I like the fabric part of the pouch to have a similar structure to the vinyl part and that's why I am using interfacing. And as always my go-to interfacing is SF101 by Pellon. It basically gives quilting cotton the structure/ feel of canvas and never bubbles up or does something weird to my fabric. Love it.
Vinyl:
For this pouch I usually use this clear vinyl on the roll. It works so nicely and is a dream to handle. No cracks when turning and it's not too sticky either - so when the pouch is empty it's literally not stuck together at the inside. Does that make sense? Saying that though you can also re-purpose some old vinyl you might have at home already. Like clear vinyl wrapping from the last bedsheets you bought or even cut up a shower curtain or plastic table cloth...
Notions:
And there are a couple notions that come in handy making this pouch. First up please, please, please always use binding clips instead of pins. Pins will leave holes in your vinyl and you don't want that! Also, you can never ever have too many binding clips. They come in handy for so many projects - I use mine all the time as I am far too lazy to use pins.
Next you will need double-sided tape to hold your layers together. Again, pins are not an option really and tape is just super straight forward. And a good investment. I bought my tape over 8 years ago and I haven't used even half of it.
Finally. When it comes to sewing with vinyl you will know it can be a little sticky. Literally...!!! And you really want to avoid the vinyl being stuck to your machine. So either you use a teflon foot, which I hiiiighly recommend. I only bought mine a couple months ago but wish I had done that ages ago. Seriously, such a game changer! But if you want to start straight away, you can also use tissue or baking paper (parchment paper if you live in the US) when sewing with vinyl or even washi tape will work. A layer of washi tape or paper in between your sewing foot and the vinyl will do all the difference!

Seriously. They are soooo so easy to make and I am sure you won't be able to stop at just one. How many things need organised in your life....?!?! Right? And then it would be a shame if you don't help your friends and family to get their things neatly stashed into pouches as well! You are very welcome!
And finally. Let me share a couple more pictures with you. My sweet daughter would like to show you how to open the pouch... Are you ready?


Ahhh, I really hope you will love your See It All Pouch as much as I do. It's so quickly made yet so very versatile...
And if you can't get enough of zipper pouches - now you learned how to insert a zipper and can't stop anymore. Why not do the jump and try this cute little pouch? It's tiny, super cute and ohhh so addictive to make. Zippers for the slightly braver seamstress - but I am sure you can handle anything now!

Take care + Happy Sewing!
Laura x
This blog post contains affiliate links, specifically I am a participant in the Amazon Services LLC Associates Program, an affiliate advertising program designed to provide a means for us to earn fees by linking to Amazon.com and affiliated sites. I will never post a link to a product I do not personally recommend. If you click on an affiliate link and then proceed to purchase something from that affiliated website, I receive a small commission. This helps me continue to provide high quality, free content. Please send me an email to laura@sweetcinnamonroses.com if you have any questions.