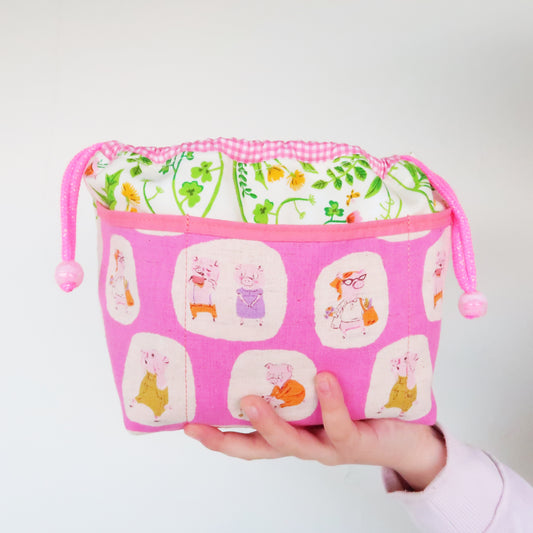
The Wee Billow Bag - the best all rounder for on-the-run or at home!
Super spacious, plenty of pockets, versatile, great for all your bits at home or when you are out and about. Why not adding a shoulder strap and take her everywhere with you... I feel she looks a little like the wee Chanel bag I always wanted but here I get to pick the fabric! Yay!!! Saying that, this one was already claimed by my daughter (again). Is that the same with you...? When you are really planning to make something for yourself only to end up giving it to a loved one again (sometimes not too voluntarily). Do you ever intentionally make something for yourself and end up keeping it?? This could be the one project you make just for yourself!
So, what do you think? Fancy making a Wee Billow Bag with me? All quilted, only your fave prints and all for yourself? Let me show you exactly how I make mine, how I add the strap and I promise you will be super excited to create your very own version of the bag!
Shall we get started?

Disclosure: Some of the links below are affiliate links, meaning, at no additional cost to you, I may earn a small commission if you click through and make a purchase.
The pattern comes in two sizes - a small one and a large one. Both super adorable and even better when fully quilted. And I am always super surprised how roomy they are... I guess that's what makes them the perfect project bag for on-the-go! Knitting, Crocheting, EPP or hand quilting... whatever your crafty heart desires!


About the Wee Billow Bag...
The Wee Billow Bag is also a fab project bag for your knitting bestie, swap partner or mother-in-law. The perfect gift for someone you like to treat. Even better if that someone is yourself, of course! Take a little time and quilt the outside (which is of course optional) and make it even more special...
Ok. Let't talk a little more about the Wee Billow Bag. Are you ready?
- The bag comes in two sizes - a wee one (measuring approx. 6.5"(w) x 4.5"(h) x 2.5" (d)) and a larger one (measuring approx. 7.5"(w) x 5.5"(h) x 3.5" (d)).
- Add (or leave out) as many pockets as you like. For the sample here I only added two pockets to the outside but you can easily add more and in the pattern I show you how to. Customise the bag by quilting the panels, go super scrappy or add a shoulder strap. So whatever option you pick - you can totally make it your own!
And if you're wondering about the pattern itself - let me tell you more about the actual pattern. Shall we start?
- The pattern is a digital file (PDF) and you can easily get your copy from my shop. After purchasing your copy it will be ready for instant download. Make sure to save it and you're ready to go. Super easy! The Wee Braw Bag is a measure and cut pattern, meaning all pattern pieces are cut using a rotary cutter, cutting mat and ruler. There is no need to print it unless you wish to do so, as there are no templates needed. So you can start today!
- The pattern is consisting of 9 pages, includes loads of pictures, detailed instructions and tables. I carefully talk you through, step-by-step. It's like I am sitting right next to you - cheering you on!! I know you can do it! I wrote the pattern with absolute beginners in mind but if you are a confident maker, I am sure you'll still love making one as well...

And of course. If you like to add an adjustable shoulder strap to your Wee Billow Bag - please check out my video tutorial and free pattern over here.
If you like to know more about teaching classes or your local guild, selling finished bags, need more information on buying, saving and printing the pattern - please hop over to my FAQs, there I try to answer all your questions in more detail.

Materials needed...
Before we start sewing, let's talk a little about the materials you'll need. Shall we?
First of all - you will need your copy of the pattern which you can find in my shop. Remember, it's a measure and cut pattern, meaning all pattern pieces are cut using a rotary cutter, cutting mat and ruler. No need to print anything, unless you wish to do so. So you can start straight away picking your fabric!
So here a list with all the things you'll need:
- Wee Billow Bag pattern
- Fabric
- Interfacing
- Zipper
- Ribbon
- Metal Hardware (optional, if you fancy adding a shoulder strap)
- Thread
- Needles and needle threader
- Notions
- Sewing Machine
Fabric:
You will need fabric. Preferably your fave fabric ever, as I truly believe in always using the best. Why hoarding it when in fact you can make something pretty from it today!? I am sure you have plenty at home but of course, if you need an excuse to go fabric shopping - you go girl!
I used some of my most treasured prints for this Wee Billow Bag. A mix of some older lines by Heather Ross, Liberty Tana Lawn and Kona cotton. The tadpoles are a super rare, older print by Heather Ross and I only get them out for something super special. Then I added a couple of my fave Liberty prints. This neon pink Betsy that I love, plus my go-to mustard Capel and this (new-to-me) Capel dandelion. And finally I used some pink Kona for the lining!
Interfacing:
To give your bag a little more structure, I recommend using a couple different types of interfacing. Some fusible interfacing for structure (especially if you are planning to use thinner fabric like Munki Munki or Liberty Tana Lawn) and fusible fleece if you are planning to quilt your panels. For this sample here I even added an extra layer of scrap quilt batting to make the quilted panel shine a little more... But that's totally up to you!
Zipper:
The Wee Billow Bag comes is two sizes. For the smaller one, you'll need a 10" zipper and for the larger one a 12" zipper. Usually I would recommend buying simple, 10" plastic zippers in bulk but for this project I think a pretty metal zipper works just so much better. Especially after quilting your panels and if you plan adding a shoulder strap, you want the bag to look the part... and a metal zipper really improves the overall look of the Wee Billow Bag.
Ribbon:
Ribbon at the ends of the zipper is optional but dang, it sure does look cute. And if you are planning to add a shoulder strap it becomes in fact essential for attaching your metal hardware...
Metal Hardware:
You'll obviously only need metal hardware if you are planning to add a shoulder strap to your Wee Billow Bag. The pattern comes without instructions for this step but let me talk you through here. You would need the ribbon (mentioned above) and use it to attach your D-ring on each side of the zipper. The width of the ring on your hook then determines the width of your strap - here in my sample the ring is super skinny and my strap had to only be 1/4" wide. Therefore I had to cut the fabric 4x as wide - 1" in this case. Fold the fabric lengthwise in half and press, open again and fold the outside towards the pressed line. Fold the strip again lengthwise in half and press. Finally topstitch along the edge and attach the strap to your hooks.
If that was a little too abstract for you, please join our free Facebook group. There I added a bonus video tutorial walking you through each step of how to add the shoulder strap.
Thread:
I am using two kinds of thread for making a Wee Billow Bag. All the construction work is done using Aurifil 50wt - for literally every seam that is hidden on the inside. And for quilting and topstitching - I am using Aurifil 28wt. Super simple rule really, all visible seams with 28wt and all hidden ones that have to last it's 50wt!
Needles and needle threader:
When it comes to binding, I like to attach it by hand. You could use the standard needles you get everywhere. And yes... they do the job just fine. Just a needle, right? But then a sweet friend introduced my to these fancy, new Japanese needles she discovered. And dang... they are the best. Super sharp and they slice through any fabric, almost like butter. They are the best. I use them for everything now. From hand quilting to closing the seams of my bags and pouches. If I need a needle you bet it's a sharp little needle by tulip. Again - if you are about to treat yourself why not investing in some some super sharp pins as well? And dang, they are also super cute...
Needle threaders are super cheap but a total must have. Especially if you have to concentrate on your fave Netlix show while quilting... *just saying*
Notions:
Next to basic sewing tools such as a self healing cutting mat, rotary cutter and ruler, I like using wonder clips instead of pins. They are just so much faster to use and I tend not to lose them as quickly. They are a bit of an investment but totally worth it if you like to spoil yourself. But of course, if you prefer pins - there are some wonderful pins out there...
When it comes to marking, I am using two different kind of tools. So if it's a visible mark, like the quilted lines on my panels, I am using my trusted Hera marker. It works a bit like a blunt butter knife and leaves a crease that you can trace, but disappears again without leaving an actual mark. And if the marks are at the inside of the bag, I am usually lazy and use a standard fabric marker. It's just faster and I don't need to look too closely to find the crease... I am all about saving time - can you tell?
Sewing Machine:
I am using my Janome MC 6700p - and I love her. She is a real workhorse, so reliable and the seams are gorgeous and always even. Never skipping a stitch. And as a bonus: she looooves Aurifil! Win win...
Making a Wee Billow Bag is much easier than you might think - A lot of straight and you can totally do it! Your HP foot will come in handy again for creating a 1/4" seam allowance in combination with your HP plate and for creating a 1/8" seam allowance you would have to switch over to your standard needle plate. If you decide to quilt some of the panels, you will love the walking foot on your Janome... it evenly feeds all the layers through your machine. It's like magic!


Community...
I know the Wee Billow Bag might look a little intimidating at first but I promise, it is really not that hard at all! Even for beginners. Lots and lots of straight lines and you can totally do it! In my pattern I carefully talk you through each step of the process and I am sure you will be laughing. I promise!
But if you feel you need a little extra help - why not join our free Facebook group? If you are new to sewing or still a little intimidated by zippers and quilting, bag making or your sewing machine in general... I get it. Because I have been there as well! And that is the reason why I am offering a little extra help over in our Facebook group. In learning sections I share lots of helpful tips and tricks with you, answer your questions and even share little videos on HOW TO tackle all my patterns. All you need to make sweet, little pouches with confidence! You can do it... HUZZAHHHH!!
So, what do you think? Fancy joining us...?

And now...
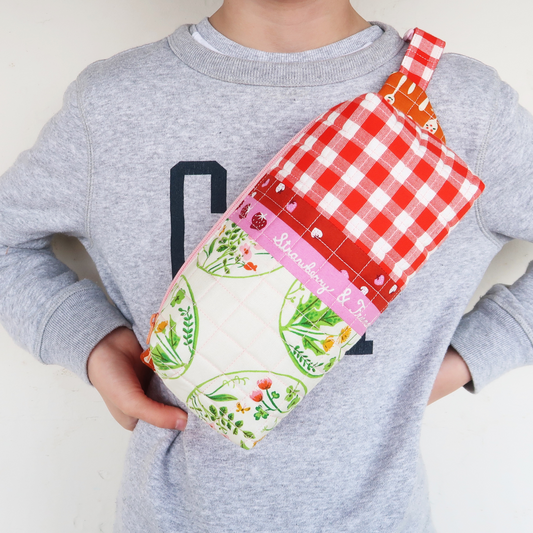
Now you tackled the Wee Billow Bag, you my friend, can do anything you set your mind to! How about a little more 3D sewing by making a Wee Braw Bag? I promise, it's again super duper easy - only straight lines...
And dang, they are seriously addictive as well. Head over to me post on the Wee Braw Bag, there I share all my best tips and tricks with you, my fave materials and lots of inspiration. Are you ready...?

As always - please find me over on Facebook and Instagram for even more inspiration or send me a DM to say hi! I'd love to hear from you.
And finally I like to take the chance to thank Janome UK for working with me. I love my Janome MC 6700p and don't want to miss her anymore... So thanks so much Team Janome for having me!
Take care and Happy Bag Making!
Love, Laura x
This blog post contains affiliate links, specifically I am a participant in the Amazon Services LLC Associates Program, an affiliate advertising program designed to provide a means for us to earn fees by linking to Amazon.com and affiliated sites. I will never post a link to a product I do not personally recommend. If you click on an affiliate link and then proceed to purchase something from that affiliated website, I receive a small commission. This helps me continue to provide high quality, free content. Please send me an email to laura@sweetcinnamonroses.com if you have any questions.